Things I’ve Sprayed Lately

I realized lately that I’ve been buying a lot of empty spray bottles when I’m at Target. It seems like all of a sudden I’m DIYing all kinds of solutions for household tasks. It struck me as weird that this is my new unintentional obsession, and what’s a blog for if not sharing your weird obsessions?

Weed Killer
I live in Cleveland, in the watershed of Lake Erie so I try not to spray anything on our lawn and garden. Roundup® is especial evil as it’s active ingredients glyphosate and POEA are extremely toxic to aquatic life (not to mention that glyphosate has been classified as a probable carcinogen). So what do you do when you have a long flagstone front walkway that gets filled with weeds quickly? You switch up the chemicals to acetic acid +lauramine oxide + sodium chloride (i.e. vinegar, dish soap and salt)! The vinegar burns the plant leaves so it can’t produce food, the soap is a surfactant that helps the vinegar stick to the leaves until it does it’s job, and the salt kills off the roots

I tried a combination of vinegar, a few drops of dish soap and plain kosher salt. I heated it up in the microwave (to help the salt dissolve) and poured it into one of my spray bottles and soaked each joint of the walkway. Within 3 days everything was dead and those neat joints lasted about a month before I had to spray again. Don’t use too much salt as it will kill the soil microbial activity (soil microbes are a good thing!) but in the cracks of a sidewalk or driveway this shouldn’t be much of an issue. The best part? I had all the ingredients but even if I didn’t I would cost about $2 to make up a batch (compared to $20+ for the commercial stuff).


IMG_6298Before

IMG_6297After 3 days

IMG_6397
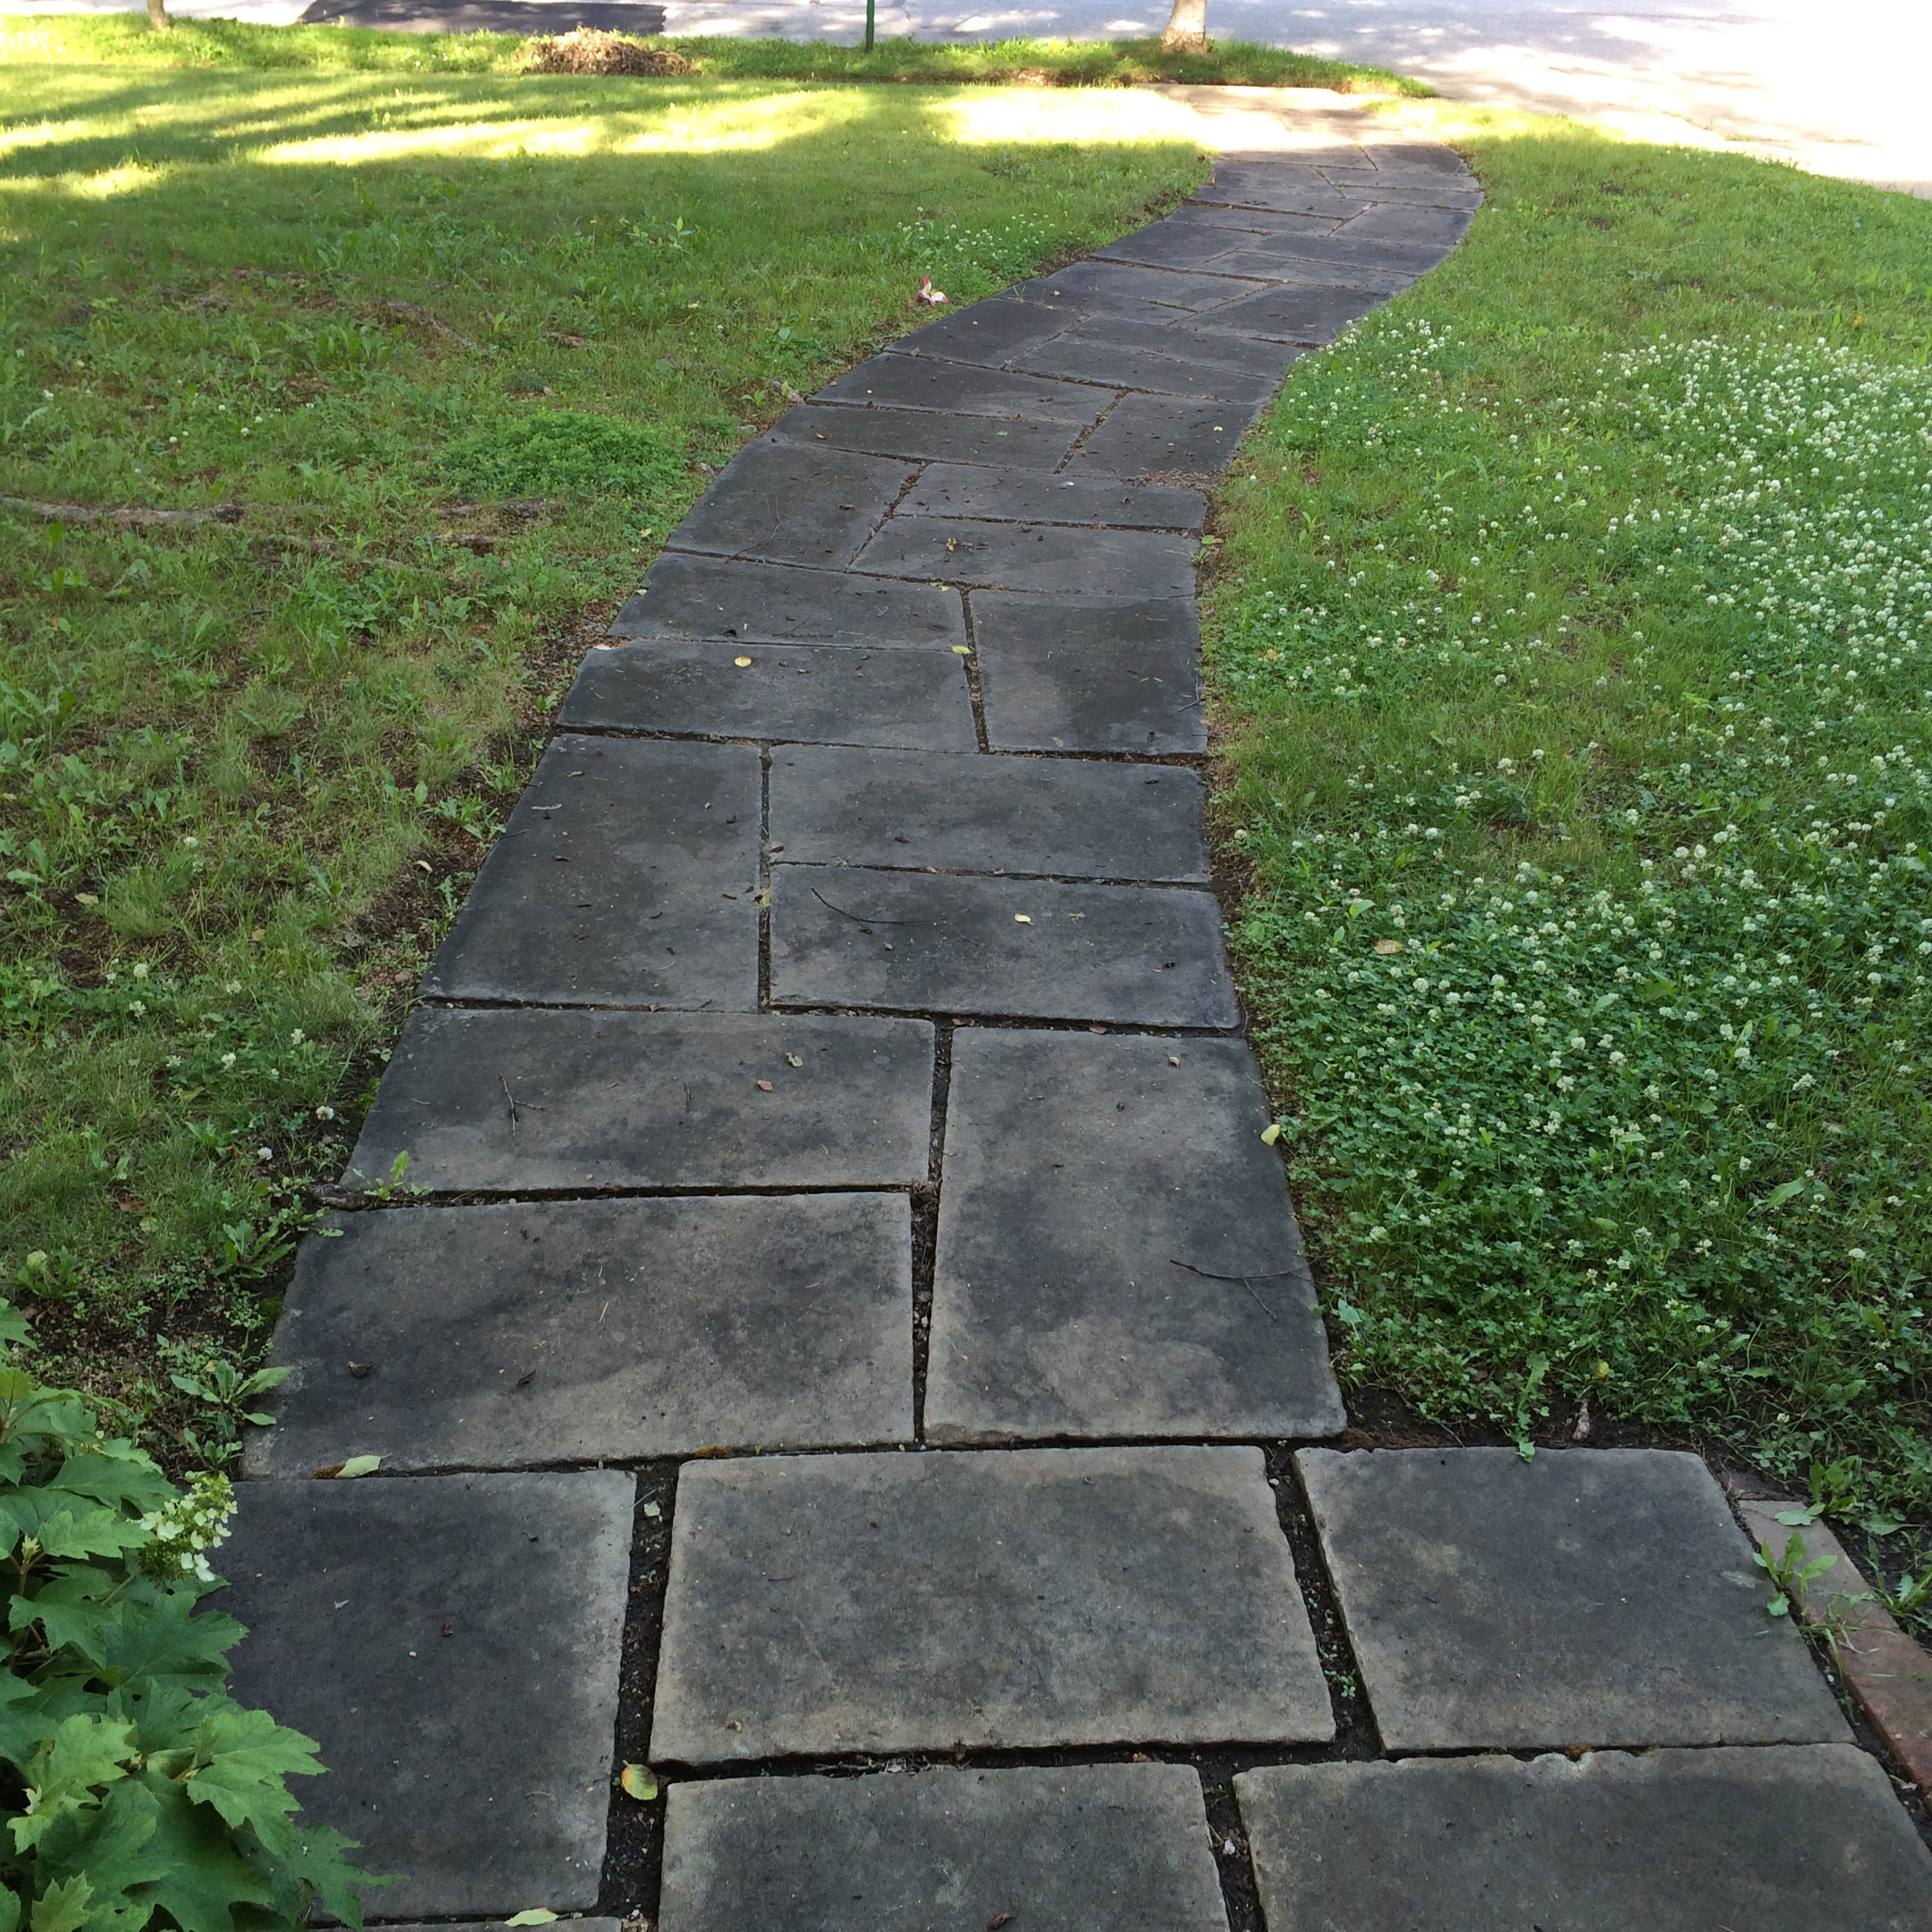
3 weeks after spraying with vinegar + soap + salt. No crack weeds!

Hard Surface Cleaner
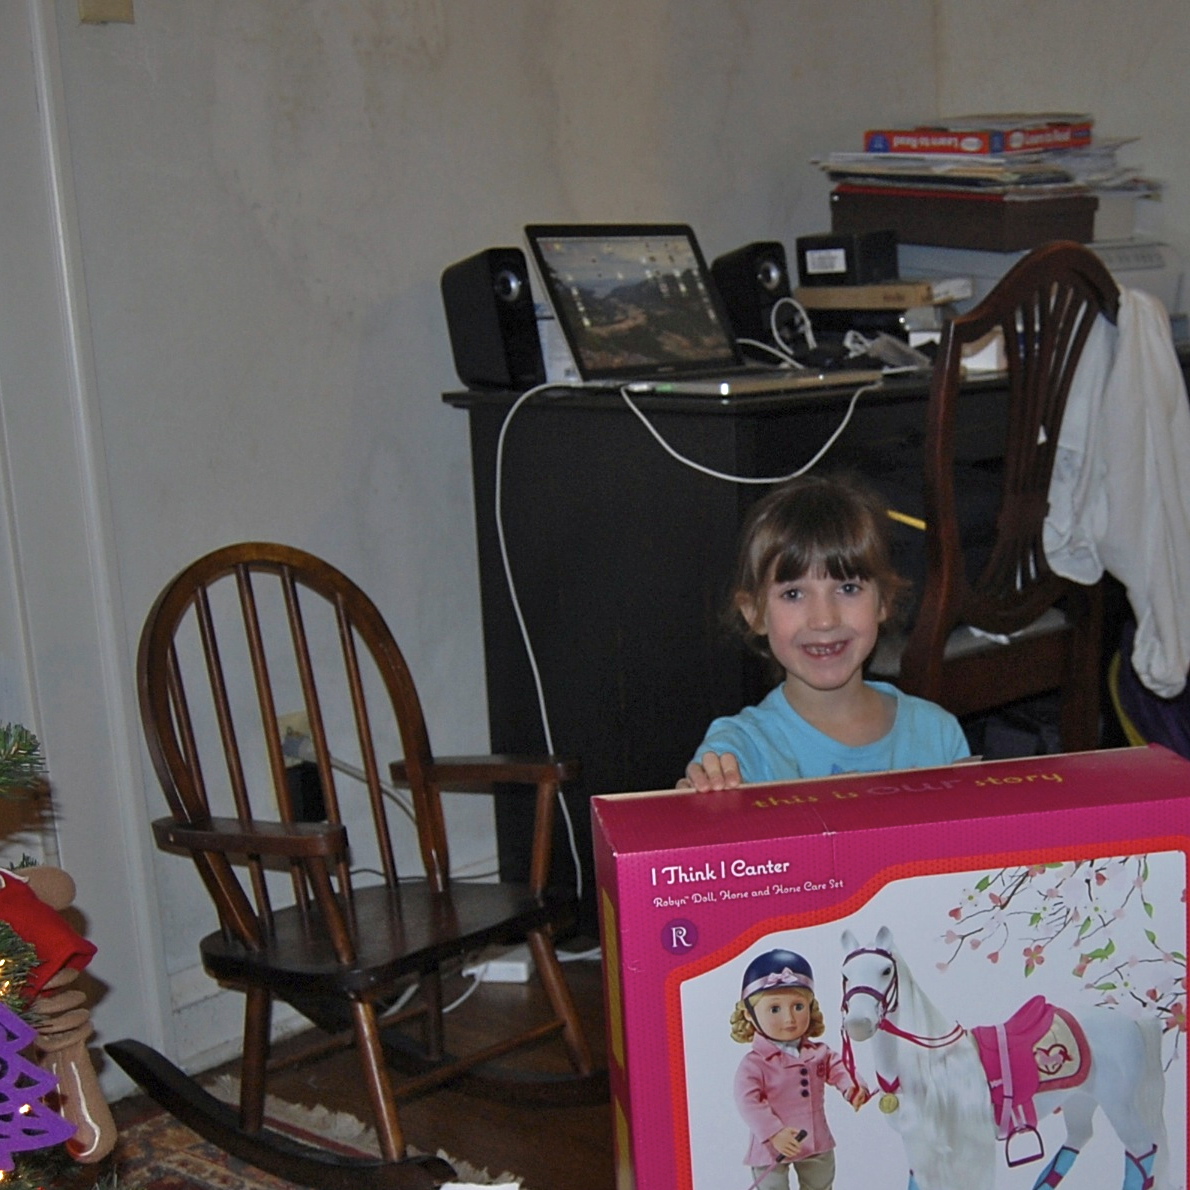
A few months ago I set up some chores for Matilda to do on a regular basis. She has a little checklist for each task and can earn allowance by getting them done. One of the chores is cleaning the bathroom and seeing her spray those smelly cleaners had me searching for a better option. So I did a little googling and came up with this new chemical concoction which I feel better about her using.

– 2 cups hot water
– 1 tablespoon castile soap (we use Dr. Bronner unscented)
– 1/4 cup rubbing alcohol
– 10 drops antibacterial essential oil (tea tree, lemon, rosemary or peppermint)

In theory it kills germs but I can’t say for sure it really does. We use this in the bathroom and the kitchen and so far no one has gotten sick so we’re sticking with it. It’s still a spray cleaner so you have to be careful about breathing in the spray, but I feel better about my kids using this than I would having them use 409 (this may be foolish, but I will keep my head in the sand on this).

Bathtub Cleaner
Yes, I finally tried that Dawn + Vinegar thing that ‘s been floating around Pinterest for years and hot ham! it actually worked. Smelled horrible but the ring-around-the-tub line from the kids was gone without scrubbing. Mix 50/50 Dawn and hot vinegar in a spray bottle, spray on and let it sit for awhile, wipe or spray off.

Hair Conditioner
This one I didn’t make but bought, however you could make it. It’s apple cider vinegar and distilled water. Spray on your damp hair and comb through. I CANNOT believe how shiny and smooth my hair is. I’ve only been using it for a few days but the difference is noticeable. It seems the recipe is about 2-3 oz of ACV to 12-15 oz. of water. I bought this because it was $3 from soap maker in my neighborhood and I can refill the bottle on my own.

IMG_6671

We are never ever ever painting again*

THE LIVING ROOM IS PAINTED. It is DONE. I know…. you’re as relieved as I am after all the complaining I’ve done on social media. Sorry about that.

This post is here to counteract all the DIY home improvement blog posts about how painting is so quick and easy and “we got it knocked out during naptime” because NOPE. Not in an old house.

As I mentioned before, these walls are bare, never painted plaster that were wallpapered so long ago it was before the days of pre-pasted paper. So. They were kind of a mess. And since our living room has a wood-burning fireplace that has been used the walls had some soot and years of dirt/grime on them. You can kind of see in the background of this picture how they looked mottled and patchy.

DSC_0211

With family Christmas happening in 2 weeks at our house, I was determined not to have those walls as the backdrop in the photos. And, it’s not like we weren’t planning in this. We bought the paint at a major sale several months ago. All we needed was the motivation (see family visit comment above) and the time (ha!).

3 (4?)weeks ago I tackled scrubbing the stubborn remnants of wall paper glue off the entryway walls. I’m sure if you’ve ever removed wallpaper you’re scoffing at me because it’s not all that difficult. But this wasn’t modern paper. All of the wallpaper and backing was gone, leaving behind a sandpaper-like thin residue of decades old paste on the walls. This involved 13 ScotchBrite Heavy Duty Scour Pads (no, generics do not work as well – believe me we’ve tried them all), very hot water, vinegar and tons of elbow grease. Every inch had to be scoured hard, then wiped with a clean rag. The corners and edges near the trim was the worst. Our tiny entry way took me about 3.5 hours just to clean. We still had over 250 square feet of living room to tackle.

IMG_9908

note how awful the baseboards are in the entry

IMG_9910

prying off the plastic corner shields the previous owners had on all the corners. You can see what the wallpaper looked like here.

We hired Michelle’s daughter to play with the kids and keep them out of our way for 3 hours on a Saturday while Mark and I took on the living room. We got about 85% of it done, later figuring out that adding a bit of washing soda to the water helped loosen the glue. By the time we finished just scrubbing and cleaning the walls we had logged about 15 man hours of time already.

On to the paint! We decided early on that we wouldn’t even try to get the trim painted this go-round – with 3 windows with muntins, a bookcase and french doors there was just no time. That will have to wait until after Christmas. But, since we were priming anyway we decided to prime the baseboards and crown moulding along with the ceiling so they were at least uniformly white. We used a stain/odor blocking Sherwin Williams primer on everything. While we could be sloppy with most of the application, where the baseboard meets the hardwoods and the ceiling took forever. But, over the course of a weekend I managed to get everything primed and ready for the color.

IMG_9913

child labor

Now, as I said we had the pain already. We had purchased 2 gallons of Spalding Gray for the living room and 2 gallons of Popular Gray for the adjoining landing and stairway. We had already pilfered some of the Spalding for the upstairs bathroom but we figured we had enough left to get us through the living room. But I panicked and decided we needed another gallon because the walls were soaking up the paint. I grabbed a gallon of paint from the shelf in the basement to take to the Sherwin-Williams store for shaking/mixing and while I was there asked them to mix another gallon for me. When I got home I panicked. The color I had taken and had another expensive gallon made was Popular Gray – the lighter color for the hallway. I freaked out on twitter when someone suggested I take the paint back and have it tinted to the darker color. Duh! I went back and they tinted it to Spalding Gray – BUT, of course that can’t be the end of it. Popular Gray is mixed into a bright white base. Spalding Gray is mixed into a deep base. So my new gallon was still a bit lighter than the other gallon and a half we had at home. So, we decided to use the lighter version as a first coat, hoping a top coat of the true Spalding Gray would work out.

IMG_0037

Cutting in – the biggest time stuck ever. 

IMG_0046

You can see here the difference between the paint mixed into a bright white base and mixed in a deep base

IMG_0056

IMG_0042

This stubby brush? A new discovery for me and it became my best friend when cutting in.

We plugged along with the color, with me cutting in and Mark later doing the roller work. Another afternoon of hiring a babysitter to corral the kids, a few hours of the kids going feral while closed in upstairs, a couple of very late nights and FOUR COATS OF PAINT LATER (1 primer, 1 base color, 2 final color) the room is done. DONE DONE DONE. (well, at least until I decide to tackle painting all the trim).

And I love it.

IMG_0082

someday I’ll post better, daylight photos

IMG_6178

Christmas mantle 2012

IMG_0127

MUCH better in 2013

*this title is likely a lie, but there is a reason painting projects only happen about once every 3 years around here. And sorry about the TSwift earworm.

Evolution of a Valentine

It started out innocently enough. My oldest child’s first school Valentine’s Day party is next week (her daycare didn’t do them) and I’m a slightly crafty mom. So I did what any parent would do. I turned to the internet. I know that 87% of kids with mom’s online did the photo lollipop last year. I wanted something cute but candy free (Matilda does not tolerate artificial dyes well), so I turned to Pinterest*. I searched “valentine” and from the hundreds of returns I narrowed it down to three:

Valentine, I’ve got my eye on you! from The Brassy Apple. A cute variation on the theme of the lollipop valentine. I found some awesome magnifying glasses on Amazon for 3 cents each. I nearly bought 25… then I saw that shipping was $5 each.

Arrrgh you ready for Valentine’s Day? from Mer MagI love, love, love sewing on paper and these seemed so easy and I had everything on hand to make them. I was kind of hoping Matilda would pick this one. (note – there are other super-cute valentine ideas on this site – look around!)

I’m bubbling with excitement from Simply Modern MomCute, simple, no candy. I searched around and found a pack of 36 bubble wands for $9. Seemed pretty easy and not terribly expensive.

I showed the options to Matilda and she picked the bubbles. The first thing I did was order the bubbles, a tiny hole punch, some glue dots and some more bakers twine (I thought I had enough but I didn’t). When they arrived I quickly made a prototype. Then those supplies have sat idly on the dining room table for a month.

This week I finally had the PDF printed, Matilda chose to have it done on lavender card stock. I had 30 printed so I could have extras if needed. Having them color printed and cut cost $6. Not being able to get the idea of sewing on paper out of my head, I decided that the cards needed some embellishment to make up for the plain white bubble wands. I had found some cute felt-heart ribbon in the Target $1 bins so I decided to sew a strip of hearts along the bottom of the card.

So, the cute “cheap” DIY valentines cost $37. Oops. But I do have a dozen bubble wands left over and of course I’ll use the twine and hole punch again. And Matilda loves her valentines so that’s all that really matters.

She signed them on the back and added some puffy heart stickers I had in the art cupboard

Are you a box-of-cards valentine buyer, or a crafter cutting out hearts and doilies for your cards?


*Note: I do not have a Pinterest account, and I never will. I know it would be too much of a time suck. I do, however, stalk some of my friend’s boards for ideas and even for gift suggestions for the board owner. And it’s a good place to search when looking for crafty ideas. 

Christmas Cookies

I am the baker in my family. Have been since about middle school or so. For years I’ve been the one to make the sugar cookies for cut outs at Christmas, loaf after loaf of zucchini bread in the summer, and birthday cakes year-round. As a newlywed I made extra money for gifts by selling my Christmas cutouts to co-workers! Now, I’m the one to provide the sugar at our family Christmas gatherings.

I have some tried-and-true recipes that I make year in and year out but I every year I also try something new. After a consultation with twitter, added 2 new recipes to the mix this year and both were fantastic. On Saturday and Sunday I made 6 different types of cookies, most of which are hanging out in the freezer until the celebrations begin. Here’s what I made…

Peanut Butter Blossoms. These are my husband’s favorite and a must every year. I use a recipe from a family friend but it’s similar to the one I linked to. I makes a ton so it’s good for a cookie exchange. If you want to up the ante like I do use mini Reese’s cups instead of the Kisses. They will melt so I usually pop the finished cookies into the freezer for 5-10 min after they cool to room temperature which will harden the Reese’s cups.

Mrs. Fields Chocolate Chip Cookies. Yes, this is the recipe that’s been floating around since email was invented. Yes they are delicious. My recipe is double what I linked to and makes a TON of cookies and even my trusty Kitchen Aid can’t handle that much dough. So I halved it and the linked recipe is the smaller version. I got to use my new Vitamix to make oat flour and to chop the chocolate this year so it went much faster. Make sure you use really good chocolate (this is not the place for Hershey’s bars). I baked 1 dozen of these then scooped the rest of the dough into balls and froze them so I can easily make fresh cookies when I need them.

Mexican Wedding Cookies. These are new this year – I don’t know why I’ve never made them before becuause they are super easy. I made them on the recommendation of Crystal via Twitter. I used the Smitten Kitchen recipe because I always have good luck with recipes she posts. And, I got to use my new Vitamix again! These are so yummy, I will be making them again.

Sugar Cookie Cut Outs – This is what started it all. I took over making the cut-outs in high school, I think. True story: my dad used to take us kids out of the house when my mom made cut-outs because of all of the cursing. At some point she switched to making them with the pre-made dough in a tube you can get at the grocery store and I thought homemade were better so I took over and have been making them ever since. I’ve tired dozens of recipes but I find the simpler the better (again, I linked not to my recipe but to a similar one). I like to roll them thin to get the maximum frosting:cookie ratio. These are frozen, undecorated and will be frosted at another time. This year, given Matilda’s sensitivity to red dye I’ll be trying out some natural (and expensive!) food coloring. And please, no royal icing… only buttercream in this house!

Orange Sugar Cookies – This was one of my “trial” recipes that made it into regular rotation. I love these cookies with or without the chocolate. I linked to the recipe I use but I up the orange zest to 3 tablespoons, increase the orange extract to 1.5 teaspoons and add 1/2 teaspoon of orange extract to the glaze. Sometimes instead of dipping the cookies I drizzle them with the glaze because I’m lazy. These are great in the summer if you use lemon instead of orange.

Mexican Hot-Chocolate Cookies – These were a trial cookie that hit it out of the park. They are insanely good – sweet with just a hint of heat. I read through the comments and decided to add the cinnamon and chili to the dry mix and rolled the cookies in plain white sugar. Next time (there will be a next time) I’ll add half a bag of chocolate chips. I’m not exactly sure how I heard about hot chocolate cookies but I looked at probably 8 other recipes before discovering Martha’s, but all the others had bad reviews in comments except for this one. I highly recommend.

I still plan on making America’s Test Kitchen’s Gingerbread Cake for our Christmas dinner dessert. That will also be a new recipe so I’ll have to report back later.

Here are a few tips if you want to make 6 kinds of cookies in a single weekend (I didn’t count, but I think when I was done there were  around 21 dozen cookies).

1) A Silpat is your saving grace (0r any other silicone baking mat). As are heavy half-sheet pans (I got mine for cheap at a restaurant supply store). Having these mean no washing cookie sheets between batches and nothing sticks. Plus the big pans can mean more cookies per batch.

2) A cookie scoop (again, I got this for cheap at a restaurant supply store). Makes scooping cookies super easy and uniform.

3) Parchment paper. I lay this out when rolling dough so I can get away with less flour which makes for a better cookie. I lay out a sheet and put pre-scooped dough balls on it while waiting for the oven. That way I can empty my mixing bowl, wash it and move on to the next dough even if all of the first kind of cookies aren’t done baking.

4) Read through all your recipes. Know what order you’re going to make them. Does it need chilled? Great – make it, throw it in the fridge then make and bake your next recipe while that one chills.

5) Mise-en-place – I know that might sound too “Iron Chef” for some but it makes all the difference. On day one I didn’t get as much done as I would have liked. So that night I got all my dry ingredients mixed, my wets mixed (where I could) and laid it all out. On Sunday morning I was able to have 3 kinds of cookies (nearly 10 dozen!) DONE before 10:30 AM (I started around 7:15 thanks to the Madman alarm). I was shocked at how much time it saved.

6) A spouse who will keep the kids out of the kitchen while you work. I love to have my kids in the kitchen with me but I was in cookie-mode and just needed them out of my hair for several hours. At kitchen with doors (like ours) so you can close everyone out is also a nice thing to have.

What are your holiday baking traditions? What recipe should I try next year?

The Most Wonderful Time of the Year (+ Tiny Prints Giveaway!)

Whoop! Whoop! Sponsored post alert! 

UPDATE! Congratulations to commenter #10, Elisa! You should be getting an email with your prize code!

Yep! I’m talking holiday cards. I love picking them out every year. I love trying to get them in the mail on December 1 – it just feels like the start of the Christmas season to me. Sometimes I make my deadline, sometimes I don’t, but I always love the process of selecting our cards, the photos and the message. Of course, doing this in the year 2012 is much easier and WAY more fun than it was in 2000 when my designer husband was forced to make us unique cards every year. Now you have your choice of custom cards, but there is one company that I prefer because their quality stands out. So, over the past week I’ve been distracting myself from the election & post-election nonsense by browsing the holiday cards at Tiny Prints.

I love their range of styles and messages. They have clever ways to disguise a “holiday letter” as a pretty card which I adore. Yes, I’m one of those people who actually likes to get brag letters (as long as they don’t include your kid’s IQ score), so doing it in the card itself appeals to me. Here are a few of the designs I’m considering:

I love a good chevron [modern chevron]

I really like the simplicity of this one but it may be to Christmasy for me [blissful border]

I love how the try-fold cards make a “brag letter” more bearable! [woodland greetings]

the storyline is a good way to do a holiday update letter, too!

I’m sure I’ll do my typical thing and make up 3 or 4 designs then make my graphic designer husband pick the best.

Are you ready to get started on your cards yet? Tiny Prints is offering a giveaway for one of my readers: $50 off any Tiny Prints order (excludes shipping, cannot be combined with other promos, expires 12/14/12). To enter, leave a comment here by midnight EST Monday night, 11/12/12 and I’ll pick a winner at random.

Whether you win the giveaway or not Tiny Prints has some great special offers right now. When do you start on your cards? Are you for or against the holiday letter? Photos: just the kids or do you get in the picture too? Tell me your card strategy!

Disclosure: Tiny Prints is giving me a credit toward my holiday card order and providing a giveaway for my readers in exchange for this postI only share products that my family  has used, so I can attest to their quality. 

Grandma G’s Applesauce

Today I tweeted about making applesauce and Monina asked if it was difficult. Before I could respond my friend Michelle tweeted her family applesauce recipe. Which, of course, is different from mine. I love seeing how other people make the same product – so much family history! Michelle’s 95-years-young grandfather is the chief applesauce maker in her family. My paternal grandmother was the applesauce maker in mine.

Everyone loved Thelma’s pink applesauce. Her secret was to leave the skins on – something only a few people do. It adds color, flavor and body to the sauce.

A few years ago, about 3 years after Grandma passed away, my mom asked me to take over the applesauce duties for our big family dinners. My aunt even bought me a food mill so I could be authentic.

This applesauce is sweet, but you can adjust to your taste. It’s also very easy. I suggest making a big batch and freezing some…that is if you have any left. My dad could eat this everyday. When I make applesauce I use a full peck of apples – I just make it in two batches – and throw a few jars in the freezer. A huge bowl of this will be going to Thanksgiving dinner with us next week.

Grandma G’s Applesauce
1/2 peck (give or take) apples, mixed varieties.
You want a mixture of sweet apples like macintosh and melrose. Get the “drops” or “seconds” if you can to save money. I got a peck of seconds at the farmer’s market for $2 last weekend.
Splash water or cider
2 tsp. cinnamon
1/4 c brown sugar

Cut all the spots and bruises off the apples. Slice (I use an apple slicer) and throw into your biggest pot.

Throw the cinnamon and sugar over the top. If you’re like me and over-filled the pot and can’t stir it without making a mess, no worries. Just stir it later as the apples break down. If your apples aren’t very juicy you can add a splash of water, apple juice or cider. I usually wait to see what kind of moisture the apples give up and add this later if needed. The liquid just makes steam to soften the apples.

Cover and cook over low to medium low about an hour or until the apples are very tender and start to fall apart when you stir them. Stir when you remember. Cool the apples until you can handle them.

Spoon the soft apples into a food mill, blender* or the grinder attachment on a mixer and process. This is a great job for kitchen helpers.

(this photo is from last October – she’s grown so much!)

Store covered in fridge for about 2 weeks. Or pour into jars and freeze. If you’re cheap like me, recycle your pickle jars for freezing. It will keep in the freezer at least a year.

*if you use a blender I would peel half of the apples before cooking since the food mill or grinder will leave some of the skin behind.


Halloween Rehash

I know, I know. Halloween was over a week ago and you’ve already got your Christmas tree up.  I don’t care. I made some kick-ass Halloween costumes and I want to share show them off.

Matilda decided she wanted to be a super hero. She didn’t want to be any specific super hero, just a super hero. I decided going the SuperGirl route because the symbol is so recognizable (and easy to recreate) and we could just say she was Super Matilda.

 Of course, if I had a Super Matilda I needed a Super Madman.

Last fall I bought a ton of satin during a fabric store-closing sale so that was in my stash. I spent about $9 on felt and some metallic pleather. The base for their costumes was new t-shirts and pants that can be worn again. Add in thread cost (the only downfall of these costumes is the number of different colors of thread I needed) plus the fusible web and I spent way more than it cost to just purchase similar costumes. But where’s the fun in that? And the shirts and pants are totally reusable. Minus the cost of the shirts and pants I spent about $25.

For the capes I used a pattern I purchased last year to make a cape for a birthday gift. The only thing I’d add to the tutorial is to sew the layers of felt/fabric together first then just sew the finished appliquéd the cape. Satin is delicate – the fewer needle holes, the better.

They are reversible …she wanted a “thunder bolt” on hers (his is the same with a green circle on navy satin).

 I made the shirts the same way I make their appliquéd birthday shirts, except this time I used layered felt instead of one layer of cotton.

Matilda’s skirt was made using my beloved Oliver + S Lazy Day skirt instructions. I’ve made this easy skirt dozens of times.

 The belts are scrap elastic that was part of the packaging of Matilda’s bed quilt – I’m not kidding. It was this great 2-inch wide pink elastic with Velcro already sewn on. I cut it down to size, added a felt “buckle” and for Madman, covered it with a tube of yellow felt.

The Madman’s “boots” are just tubes I sewed out of red felt safety-pinned to his fleece Old Navy pants. Matilda wore new boots (boots I was going to buy her anyway).

I love, love, love these costumes and they’ve already re-worn the shirts and pants.  Madman’s shirt got a few little holes around the appliqué when I washed, but I fixed it with an iron-on patch.

Matilda and I had fun photographing her costume. And the capes are in the dress up box ready for more use!

(Chalk idea stolen from BurghBaby)

Skillz

In recent conversations, both in-person and online I have been amazed at how many people (both men and women, for the record) who don’t know how to do what I would consider “basic skills”. For instance, the amount of people who drive a car daily but don’t know how to change a tire is fascinating.

I learned how to do it in Drivers Ed because, just like putting gas in a car and checking the oil, it’s part of basic maintenance and operation of a vehicle. And yes, I’ve changed a tire more than once. I’ve also called AAA; but I know that there are times and places where I won’t have cell reception and I am going to be responsible for myself.

Anyway all of this got me thinking of what skills I want my children to have by the time they go to college. This is ever-evolving, of course, but here’s what I have so far:

Car care/operation: Change a tire, check tire pressure, check/add oil (and/or whatever new technology brings), how to read a paper map

Clothes: sew a button, fix a hem, iron, operate a washer and dryer without ruining the clothes. Bonus – if either kid wants to, I will teach them to use a sewing machine.

Home & Garden: start and use a lawn mower, paint, plant flowers, operate a drill and other basic tools, how to install new locks.

Cooking: make perfect chocolate chip cookies, cook a variety of proteins, make bread, make our family’s favorite recipes, make a good marinara sauce, cook perfect eggs, how to follow a recipe, starting a charcoal grill, cooking on a grill.

Maybe part of it was being the youngest of 3 and having “tired” parents, but I did all of these things by the time I was in high school. I mowed the grass in late elementary school. By 4th grade I was let lose in the kitchen without supervision and became the chief cookie and zucchini bread maker for the family. The summer between my 8th and 9th grade years I removed wallpaper and painted several rooms in our new house. I learned to sew from my mother and my middle school required Home Economics* so I furthered my skills there.

I remember being dumbfounded by a college classmate who had no idea how to use the dorm washing machines. I don’t want either of my children to be “that kid”. Beyond that I think that most of these things are simply basic parts of being a functioning adult and it’s my responsibility to teach my kids how to do them.

What “basic” skills do you want to teach your kid? As an adult, what skills do you wish you had?

*we were also required to take Shop where I learned things beyond basic tools like a drill press, table saw and metal working tools. Those classes were the best! I wish schools still required this.

Season’s Greetings

Now that Halloween is behind us it’s time for the rapid decent into the end-of-year holidays and one of my favorite traditions – the holiday card.

I LOVE holiday cards and look forward to them each year. I love picking photos, searching out the best designs and writing greetings. I also am like a kid in the candy store when it comes to receiving cards. I can’t wait to get to the mailbox each day and I have a huge stack of cards from previous years stashed away with our holiday decorations. If it has a photo I’m keeping it and I’ll pull it out each year and admire it.

I blame my parents for this. They do the dreaded “Christmas Letter” every year (and every year I’m surprised to see what they think my work title is – it changes annually and is never correct). But they also keep all the letters they receive and each year when we are celebrating Christmas at their house both my sister and I pour over the letters and photos. I marvel over old neighbors for whom I babysat – their kids now graduating from college. Or getting a once-a-year update from second or third cousins. I love this tradition.

With a husband who is a designer we’ve gone the custom route before. But, these days it both quicker (have you ever worked with a designer who is his own toughest critic on his personal projects? Good luck getting a final design) and cheaper to go the pre-made route. Plus with the number of layouts to choose from there is a slim chance people will see your card over and over again in their mailbox.

Enter Shutterfly.  I’ve been using Shutterfly since the days when you sent them your film and they sent back your photos. Remember film? Yeah – it’s been that long.  I’ve even managed to get my mom hooked on the site and if it’s easy enough for her to use then anyone can use it. She loves to make photo books for the grandkids – chronicling her adventures with them. Those are some serious treasures; M loves reading her special books as bedtime stores.

Anyway, we’ve used Shutterfly for holiday cards before and will be doing so again this year. Seriously, with over 500 designs to choose from how can you go wrong? But, yeah – 500 designs to chose from. I need you to help me pick. Here are the 3 I’ve narrowed it down to:

I love this one because we had Wonderful World played at our wedding. Plus I would give us the opportunity to show off some of the great photos Heather took of the kids.

I like how this one is part photo card part “family update letter”

I really like how simple this one is and how it doesn’t scream “holiday” from the outside. I could hang a card like this on the fridge and not worry about it being out of season.

So help me pick – tell me which one you like best. And tell me – are you a holiday card collector like me? Do you write a letter or just send a card? Or do you skip it altogether?

Disclosure: I received 50 free holiday cards from Shutterfly for this post.  All opinions are 100% mine and based on previous services/products for which I paid.

Super Heroes Can Sew

It’s no secret that I like to sew. I actually like knitting better but sewing has the instant gratification thing going for it. (Don’t ask me about MAD’s baby blanket that I started knitting almost a year ago). I don’t consider myself a very good seamstress but I can find my way around a sewing machine. In my middle school you had to to take both home ec and shop – something for which I will be forever grateful. My mom taught me how to sew, but Home Ec gave me some structure and cemented most of  my skills since we had to make an article of clothing and a stuffed animal for grades. As a side note – do schools even offer home ec and shop anymore? Those classes taught me some wonderful life skills and everyone (boys and girls) had to take 2 years of each. It was brilliant.

Anyway, while I do plently of sewing for our household I don’t often consider sewing for others. I’m too self-conscious of my lack of skills. I once made roman shades for our friends/neighbors and I was nauseous the entire time I worked on them because I feared screwing them up. I can guarantee that you will never find me on Etsy as I think that kind of pressure would give me an ulcer. So, I stick with fun projects for the kids and easy things like curtains and repairs.

Then Heather posted this pic of a superhero set she made for her nephew I thought “I think can do that!” and we had a birthday party for a 3 year old girl the following Sunday. So, I started looking around the internet and came across a ton of instructions and tutorials. I ended up mostly using this one. As luck would have it, satin is on super-sale due to Halloween. That plus felt and thread and I spent a whopping $7.39 on supplies. I figured it was a pretty small investment and if it sucked we could go buy a more conventional gift. However, I think it turned out pretty well:


Of course, in my sleep deprived and somewhat rushed state, I put the appliques on the wrong sides (I intended for the purple star to be on the pink satin and the pink circle to be on the purple side – oops!). And having never worked with satin before the seams are a bit overworked – that stuff is slippery! But the birthday girl didn’t seem to care & put it on right away:

And, since I was on a sewing roll I whipped up a matching number shirt for her to rock during her 3rd year. Do you know much 3 year olds loving sharing their age? This shirt makes it easy:

The project was so much fun I already have the materials to make a cape for M. And I think I may be taking more handmade gifts to future birthday parties.